How To Cut Cat Nails Safely and Stress-Free at Home
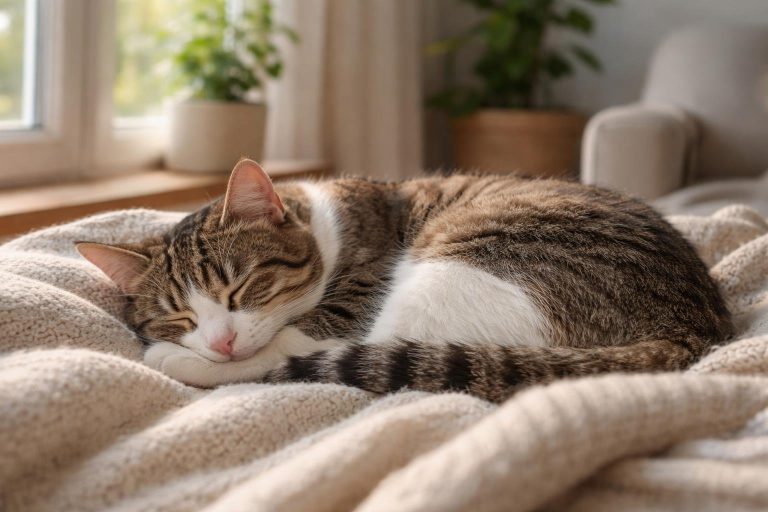
Trimming your cat’s nails might seem intimidating, but it’s a necessary part of responsible pet ownership that protects both your furniture and your cat’s health. Cat nails require trimming every 1-2 months to prevent splitting, breaking, and overgrowth that can cause discomfort or injury. With the right approach and tools, you can transform this task from a stressful battle into a calm routine.
Many cat owners avoid trimming their cat’s nails because they worry about hurting their pet or dealing with an uncooperative feline. The good news is that every cat can be trained to tolerate and even enjoy their nail trims through gradual acclimation and positive reinforcement. Learning the proper technique will help you avoid common mistakes and make the experience better for both you and your cat.
This guide walks you through everything you need to know, from selecting the right nail clippers to handling what happens if you accidentally cut too far. You’ll discover how to safely restrain your cat, identify where to cut, and establish a maintenance schedule that keeps those claws in perfect condition.
Key Takeaways
- Use proper cat nail clippers and trim only the clear portion of the nail to avoid cutting the quick
- Acclimate your cat gradually with positive reinforcement and handle their paws regularly before attempting to trim
- Maintain a regular schedule of trimming every 1-2 months to prevent overgrowth and keep your cat comfortable
Essential Tools for Cutting Cat Nails
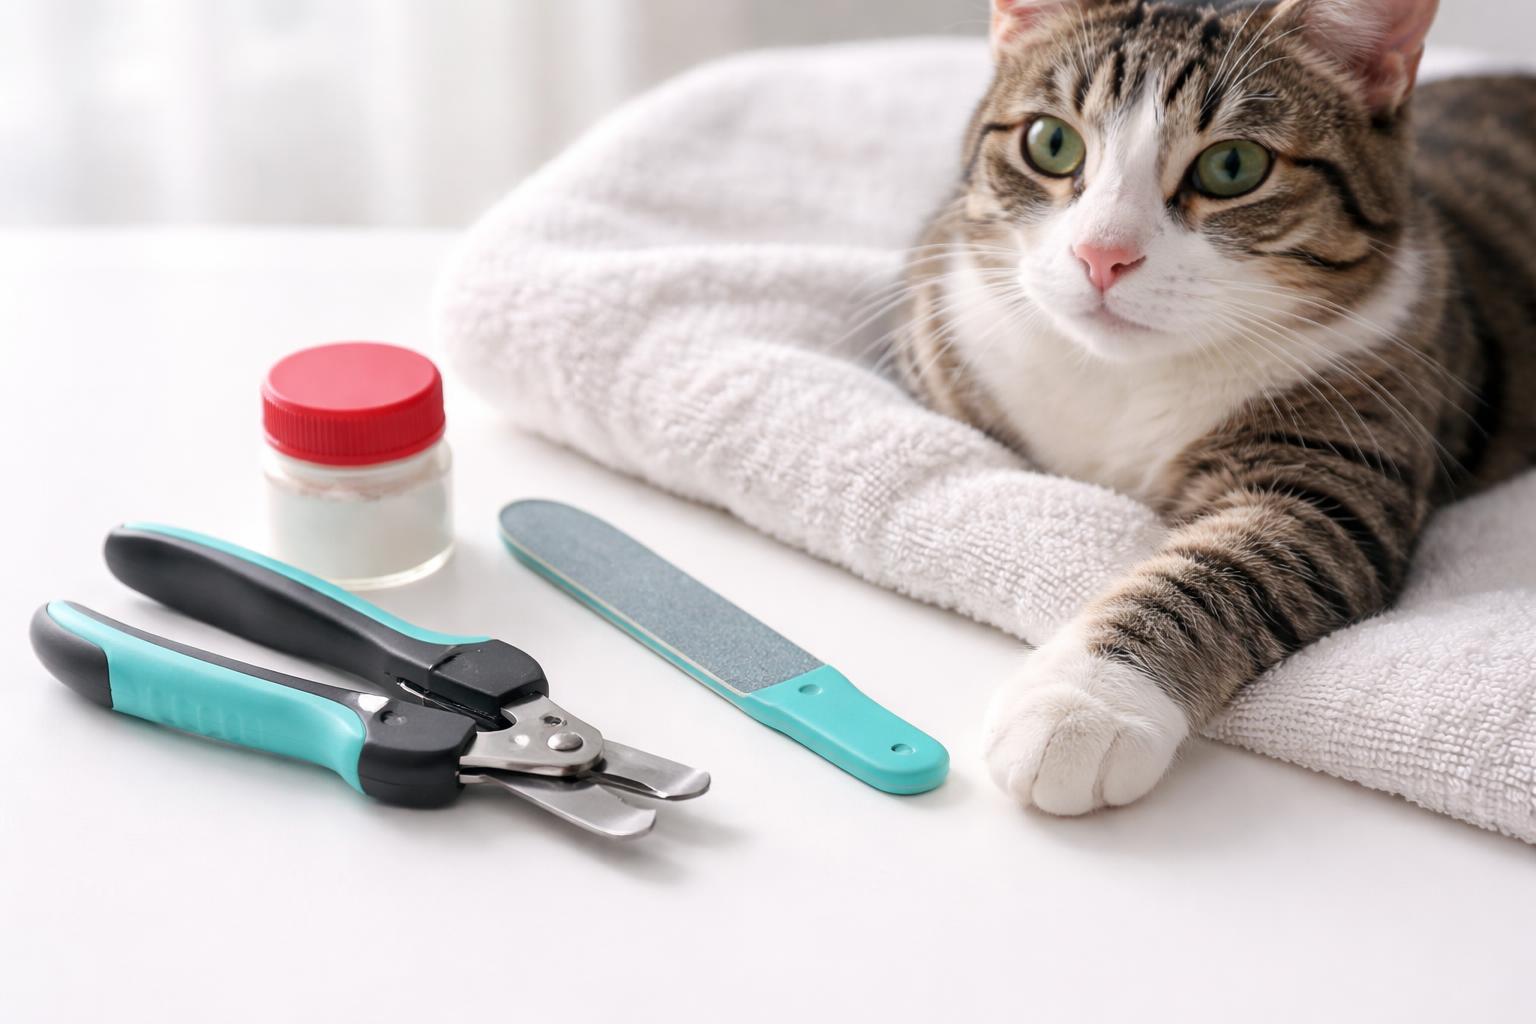
Having the right equipment makes nail trimming safer and more efficient for both you and your cat. Quality clippers designed specifically for cats, along with safety supplies like styptic powder, are fundamental items every cat owner should have on hand.
Types of Cat Nail Clippers
Cat nail clippers come in several distinct styles, each with specific advantages. Scissor-style clippers feature two blades that cut like regular scissors and work well for cats of all sizes. They offer precise control and allow you to see exactly where you’re cutting.
Guillotine clippers have a hole where you insert the nail and a blade that slides across when you squeeze the handle. These work best for smaller nails and provide a quick, clean cut. However, they can be harder to position accurately compared to scissor-style options.
Plier-style clippers resemble small pruning shears and deliver strong cutting power. These are ideal for larger cats or thicker nails. They typically include a safety guard to prevent cutting too much nail at once.
Human nail clippers can work in a pinch for kittens or cats with very small, thin nails, but dedicated pet nail clippers provide better control and cleaner cuts. A cat nail clipper set often includes multiple styles so you can choose what works best for your cat.
Using a Nail Grinder
A nail grinder is an electric tool that files down nails gradually instead of cutting them. This method reduces the risk of cutting into the quick and creates smooth edges without sharp points. Grinders work particularly well for cats who struggle during traditional clipping sessions.
The main drawback is noise and vibration, which can frighten some cats. You’ll need to introduce the grinder slowly, letting your cat get accustomed to the sound before using it on their nails. Start by running the grinder near your cat without touching their paws, then gradually work up to brief contact.
Cordless models offer more flexibility and easier maneuvering around your cat’s paws. Look for grinders with multiple speed settings so you can start slow and adjust as needed. The grinding process takes longer than clipping, so patience is essential.
Styptic Powders and Pencils
Styptic powder helps stop bleeding fast if you accidentally cut into the quick. The powder contains ingredients that promote rapid clotting when applied directly to the bleeding nail. You simply dip the nail into the powder or press a small amount against the cut.
Styptic pencils serve the same purpose but in a solid stick form. You wet the tip slightly and press it against the bleeding nail for several seconds. Pencils can be less messy than powder but may sting more on application.
Keep either product within arm’s reach during every nail trimming session. Even experienced pet owners occasionally nick the quick, especially with cats who have dark nails where the quick is harder to see. Cornstarch or flour can work as emergency alternatives if you don’t have proper styptic products available.
Recommended Cat Nail Clipper Brands
Safari and Millers Forge produce reliable scissor-style clippers at affordable prices. Both brands feature sharp stainless steel blades that stay effective through many trimming sessions. Their ergonomic handles reduce hand fatigue during use.
The Heper cat nail clipper stands out for its LED light feature, which illuminates the nail to help you avoid the quick. This makes trimming significantly easier for cats with dark nails. The brand also offers excellent grip comfort and blade sharpness.
Resco manufactures high-quality guillotine clippers favored by many veterinarians and groomers. Their replacement blade system means you don’t need to buy entirely new clippers when blades dull. The company offers a lifetime guarantee on their products.
For nail grinders, Dremel and Casfuy make popular models designed specifically for pets. These brands offer quiet operation, multiple speed settings, and rechargeable batteries for convenient use.
How to Prepare for Cat Nail Clipping
Success with cat nail clipping depends on proper preparation before you pick up the clippers. Timing, environment, and familiarization with tools all play critical roles in making the experience less stressful for both you and your cat.
Choosing the Right Time
Pick a time when your cat is naturally calm and relaxed, such as after a meal or a play session. Cats are typically more cooperative when they’re tired rather than during their active periods.
Avoid attempting to trim your cat’s nails when they’re energetic, hungry, or already agitated. Early morning or late evening often works well for many cats, but you’ll need to observe your pet’s individual routine.
If your cat seems stressed on a particular day, postpone the session. Forcing nail clipping when your cat is anxious can create negative associations that make future attempts more difficult.
Creating a Calm Environment
Choose a quiet room away from loud noises, other pets, and household activity. A bathroom or bedroom with the door closed works well for minimizing distractions.
Consider using Feliway or similar calming pheromone diffusers in the room 30 minutes before the session. These products can help reduce anxiety in cats.
Place a non-slip mat or towel on a stable surface at a comfortable height for you to work. Good lighting is essential so you can clearly see the nail and avoid cutting the quick.
Keep treats nearby to reward cooperation throughout the process. Remove any potential escape routes or hiding spots that might tempt your cat to flee mid-session.
Introducing Tools to Your Cat
Let your cat investigate the nail clippers several days before you plan to use them. Place the clippers near their favorite resting spots so they become familiar objects.
Practice handling your cat’s paws without clipping for several sessions. Gently press their paw pads to extend the nails while offering treats and praise.
Desensitization steps:
- Touch the clippers to your cat’s paws without cutting
- Make the clipping sound near your cat while giving treats
- Clip a single nail and immediately reward with a high-value treat
- Gradually increase the number of nails clipped per session
This gradual approach helps cats associate the tools and handling with positive experiences rather than stress.
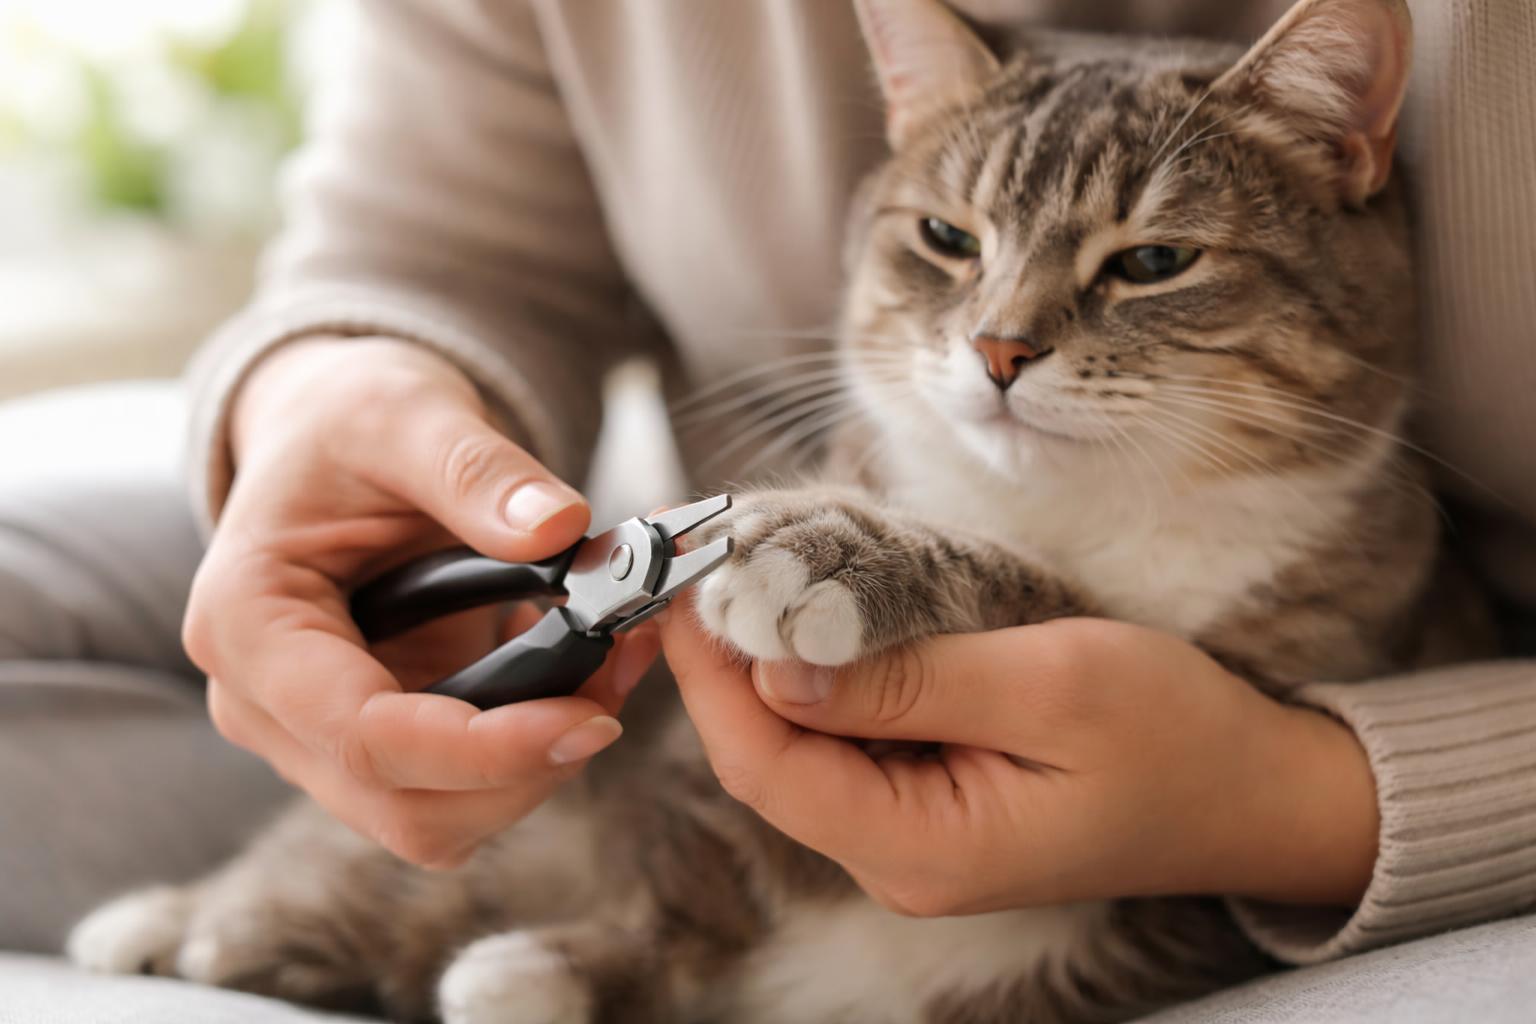
How to Hold a Cat to Trim Nails
Proper positioning and secure handling are essential for safely trimming your cat’s nails. The right restraint technique keeps both you and your cat calm while preventing scratches or sudden movements during the process.
Safe Restraint Techniques
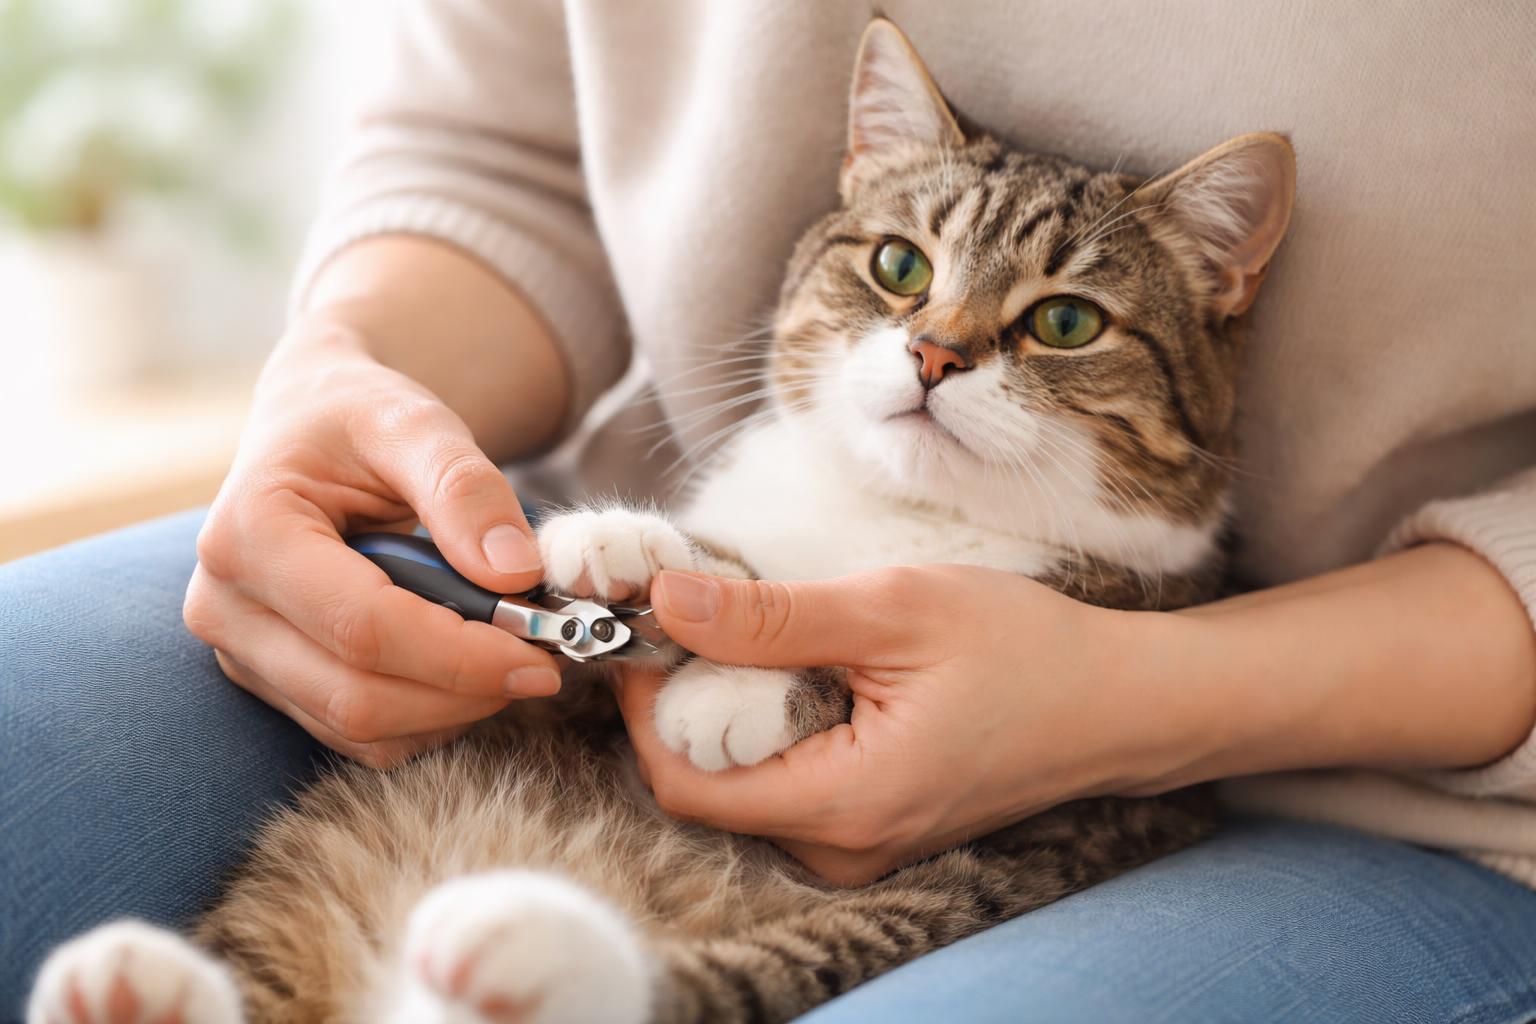
Position your cat on a stable, non-slip surface like a table covered with a towel or mat. Place one hand gently but firmly around your cat’s chest, just behind the front legs, while supporting their hindquarters with your other arm.
For calmer cats, you can hold them in your lap with their back against your stomach. This position allows you to use one hand to extend each paw while maintaining control.
Apply steady, gentle pressure rather than gripping tightly, which can cause panic. If your cat struggles, pause and let them resettle before continuing. Never restrain by the scruff alone, as this can cause pain and anxiety in adult cats.
When extending each paw, press gently on the pad to expose the claws. Hold the paw between your thumb and forefinger, keeping your grip firm enough to prevent withdrawal but gentle enough to avoid discomfort.
The Towel Wrap Method
The burrito or towel wrap method works well for cats that resist traditional handling. Lay a large towel flat and place your cat in the center, leaving their head exposed.
Wrap one side of the towel over your cat’s body, tucking it snugly underneath. Then fold the other side over, creating a secure wrap that immobilizes their body while keeping them comfortable.
Leave one paw exposed at a time for trimming. Once you finish that paw, tuck it back into the towel and expose the next one. This step-by-step restraint technique prevents your cat from using their legs to push away or scratch.
The wrap should be snug but not tight enough to restrict breathing. Your cat’s face should remain completely uncovered to reduce stress and allow normal respiration.
Holding Polydactyl Cats
Polydactyl cats have extra toes, typically on their front paws, requiring additional attention during nail trims. These cats may have six or seven toes per paw instead of the standard five.
Carefully examine each paw to identify all claws, including the extra digits that often sit higher on the paw. The dewclaw-like extra toes can easily be missed during trimming.
Use the same gentle pressure technique to extend each toe individually. The extra digits may be positioned at different angles, so adjust your hold accordingly to access each nail clearly.
Take extra time with polydactyl cats to ensure you’ve identified and trimmed every claw, as missed nails can grow into the paw pad and cause pain.
Involving a Helper
A second person significantly simplifies the nail trimming process, especially for anxious or resistant cats. The helper should focus on gentle restraint while you concentrate on the actual clipping.
Have your helper hold the cat using the chest and hindquarter technique described earlier, or let them use the towel wrap method. They should speak softly to the cat and provide steady, calm control.
The helper can also offer treats or use a finger to gently scratch your cat’s favorite spots as a distraction. This positive reinforcement makes future nail trimming sessions easier.
Position yourselves so the helper holds the cat at a comfortable height for you to work. Clear communication between you and your helper ensures smooth transitions between paws and prevents accidental quick cuts if the cat moves suddenly.
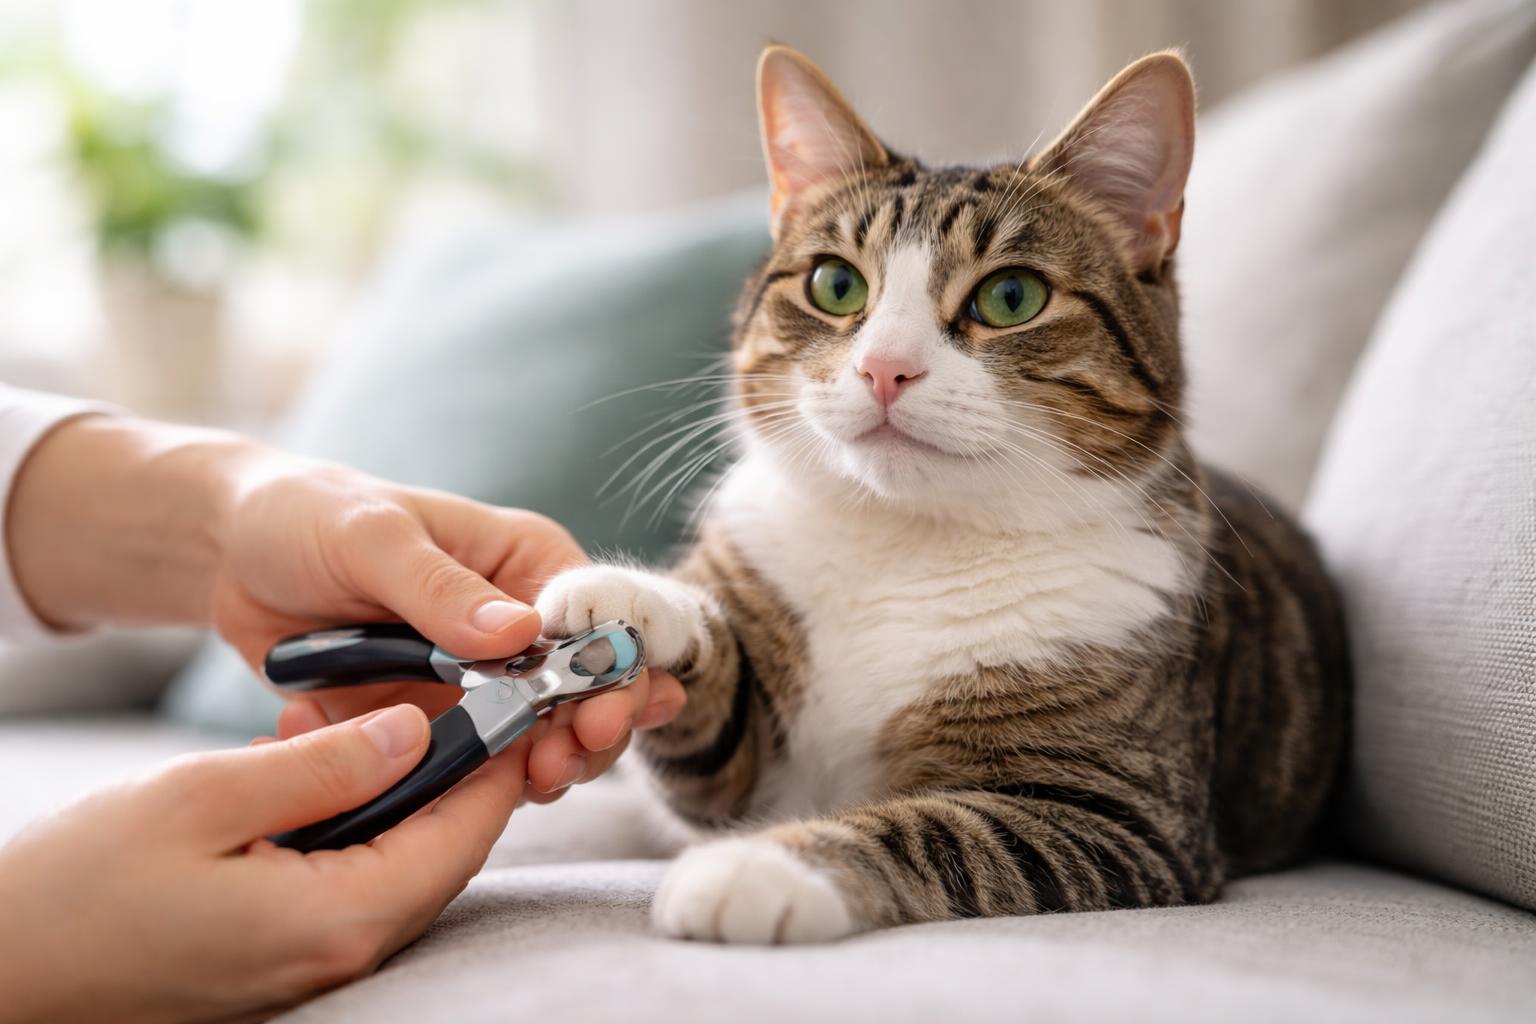
Step-by-Step Guide: How to Cut Cat Nails
Proper nail trimming requires understanding cat claw anatomy and using the correct technique to avoid injury. The process involves extending each claw, locating the sensitive quick, and making precise cuts at the appropriate angle.
Extending the Claw
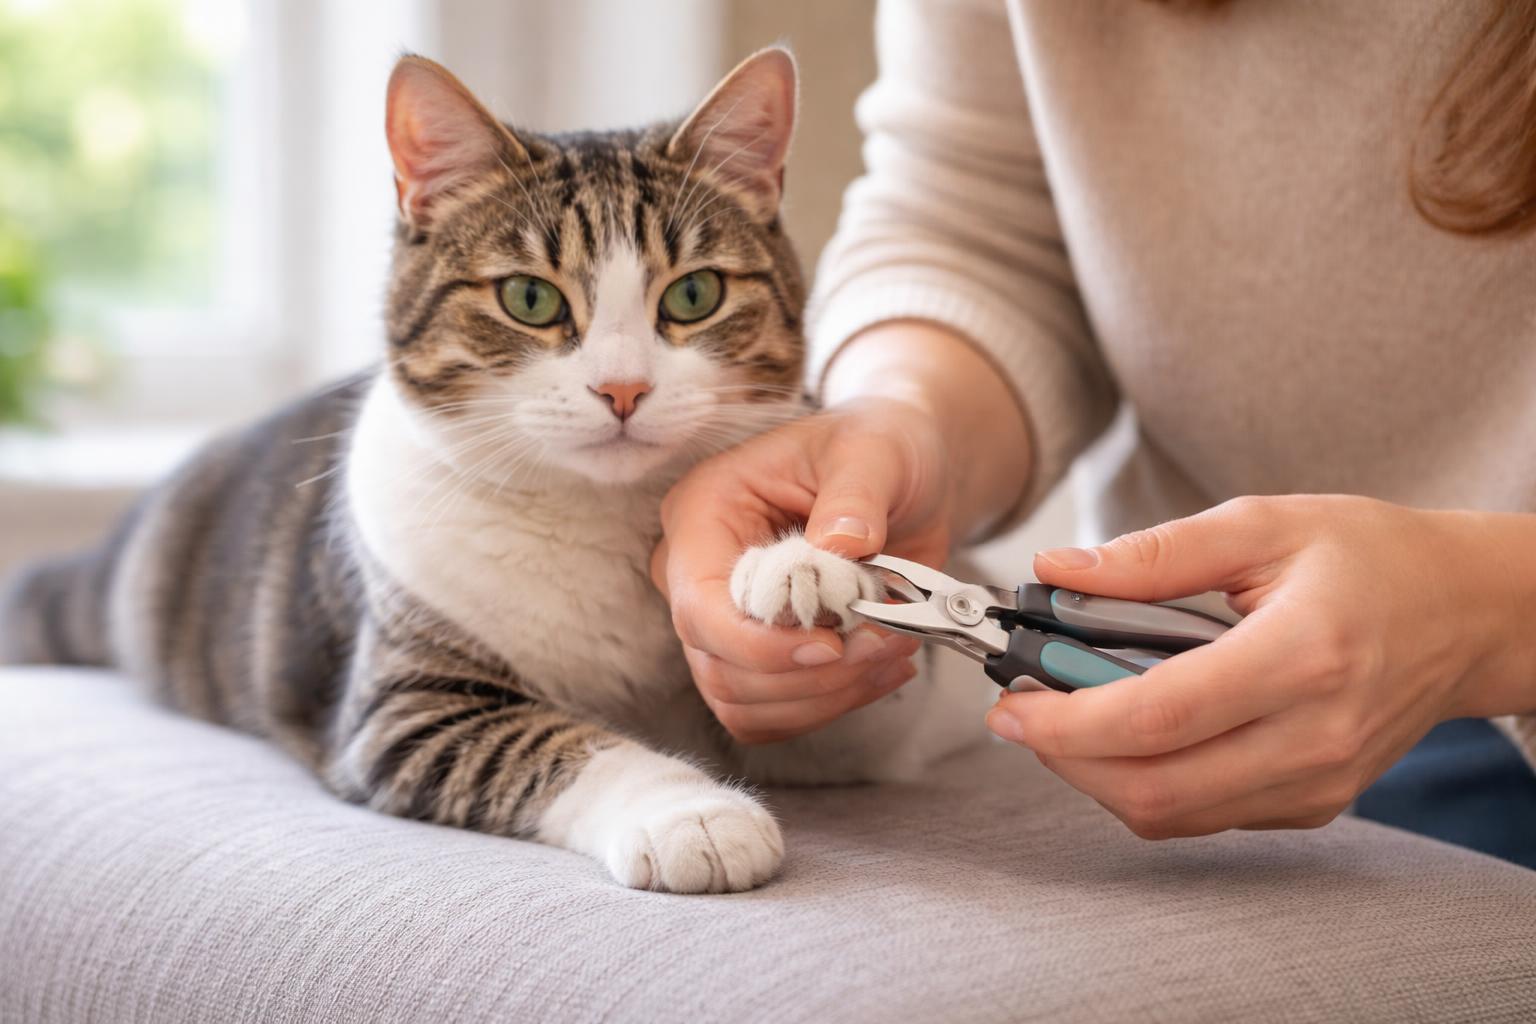
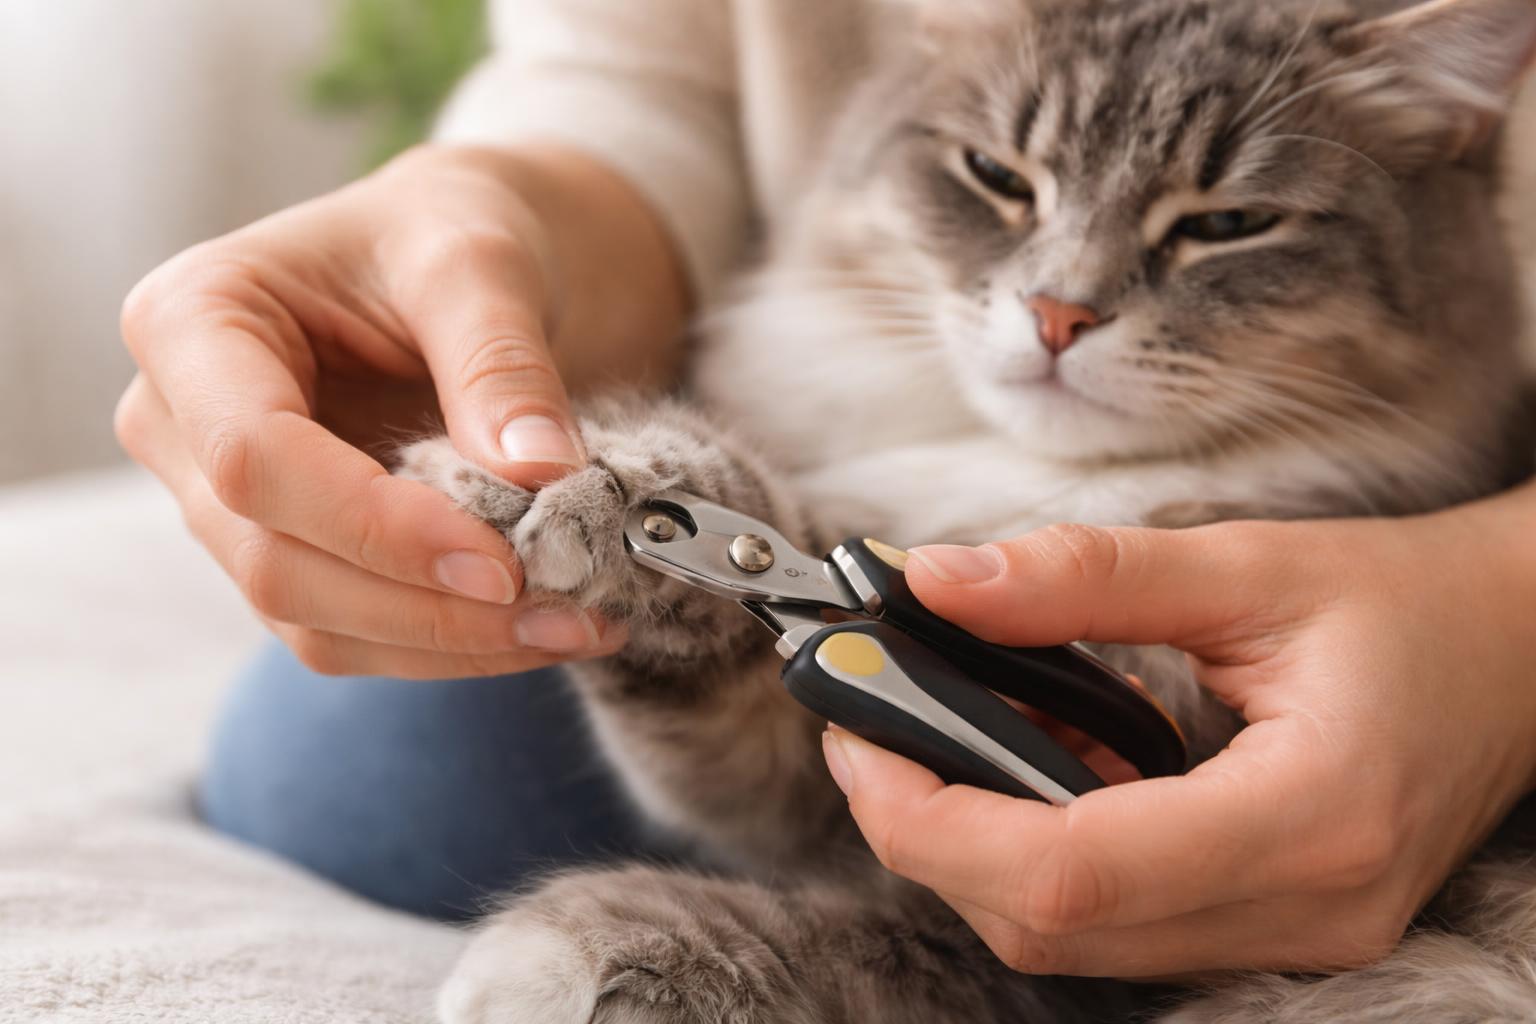
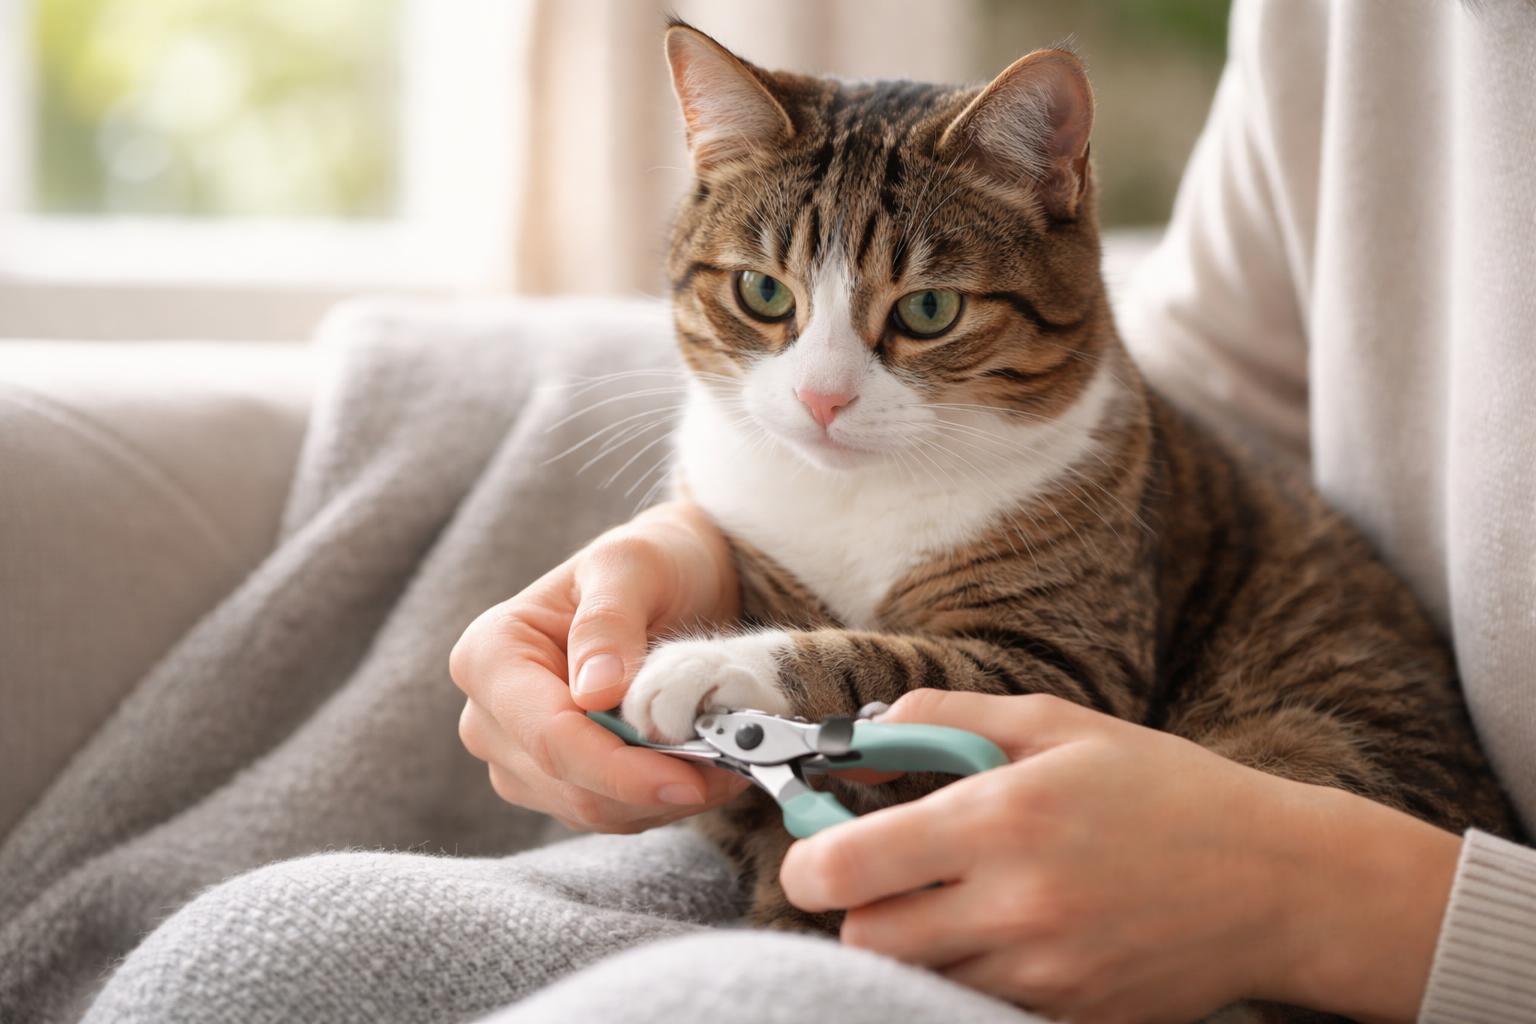
You need to gently press on your cat’s paw pad to expose the nail fully before you trim. Place your thumb on top of the paw and your index finger on the pad underneath, then apply light pressure. The claw will naturally extend outward from the paw.
Hold the paw firmly but not tightly to avoid causing discomfort or resistance. Your cat should remain calm during this process, so avoid squeezing too hard. If your cat pulls away, release the paw and try again after a brief pause.
Make sure you can see the entire nail clearly before proceeding. Good lighting helps you identify important structures within the claw. Position yourself so you have an unobstructed view of the nail from the side.
Identifying the Quick
The quick is the pink tissue inside the nail that contains blood vessels and nerves. You must avoid cutting the quick when you trim cat nails because it causes pain and bleeding. In cats with light-colored claws, the quick appears as a distinct pink area inside the translucent nail.
Look at the nail from the side to see where the quick ends. The safe cutting zone is the clear, hook-shaped tip beyond the pink tissue. Leave at least 2mm of space between your cut and the visible quick.
Dark or black nails make identifying the quick more difficult since you cannot see through the nail. In these cases, trim only the sharp tip of the claw in small increments. You can also shine a flashlight behind the nail to help illuminate the quick’s location.
Correct Clipping Technique
Position the clippers perpendicular to the nail, not parallel, to prevent splitting or crushing. The cutting blade should face you with the nail inserted into the opening. Squeeze the handles quickly and decisively to make a clean cut rather than a slow, crushing motion.
Proper cutting angle: Cut the nail at a slight angle following its natural curve. Avoid cutting straight across, which can leave sharp edges.
Cut only the curved tip of the nail where it begins to hook downward. Start with small cuts if you’re uncertain about how much to remove. You can always trim more, but you cannot undo cutting the quick.
Trim one nail at a time and give your cat breaks if needed. Some cats tolerate having all their nails done in one session, while others need the process split across multiple days.
Trimming Dewclaws
Dewclaws are the small nails located on the inside of your cat’s front legs, above the paw. These nails don’t touch the ground during walking, so they don’t wear down naturally and require regular trimming. Overgrown dewclaws can curl into the paw pad and cause pain or infection.
Locate the dewclaw by running your hand up the inside of your cat’s front leg. You’ll feel a small digit with a nail about an inch above the main paw. Gently hold the leg and extend the dewclaw using the same technique you used for the other nails.
Trim cat nails on the dewclaw with extra care since these are often more curved than regular claws. The quick in dewclaws can extend further into the nail than in other claws. Cut only the sharp, hooked tip to maintain a safe distance from the quick.
What to Do If You Cut the Quick
Accidentally cutting into the quick causes bleeding and discomfort for your cat, but you can manage the situation effectively with the right supplies and calm approach. The priority is to stop the bleeding quickly, keep your cat relaxed, and know when professional help is necessary.
Stopping the Bleeding
When cutting the quick occurs, blood will appear immediately because this area contains blood vessels and nerve endings. Apply styptic powder directly to the bleeding nail by dipping the nail into the powder or pressing the powder against the cut with a cotton swab or clean cloth.
Styptic powder works by contracting blood vessels and promoting clotting within seconds to minutes. If you don’t have styptic powder available, a styptic pencil can serve as an alternative, though it may sting slightly more upon application.
Without these products, you can use cornstarch, flour, or bar soap as emergency substitutes. Press the powder firmly against the nail for 30 seconds to two minutes without removing it to check, as this disrupts clot formation. The bleeding typically stops within a few minutes with proper pressure and application.
Calming Your Cat
Your cat will likely react with distress after experiencing pain from the nail trim. Speak to your cat in a soft, reassuring tone and avoid sudden movements that might escalate their anxiety.
Release your cat if they’re struggling intensely, as restraining them further can increase stress and potentially cause injury to both of you. Offer treats or their favorite food once the bleeding stops to create a positive association and reduce fear.
Give your cat space to retreat to a comfortable area where they feel safe. Monitor their behavior for the next few hours to ensure they’re not excessively licking the affected paw, which could reopen the wound or cause infection.
When to Seek Veterinary Care
Most cases of cutting the quick resolve at home without complications. However, contact your veterinarian if bleeding continues beyond 10 to 15 minutes despite applying styptic powder and pressure.
Seek immediate care if you notice signs of infection over the following days, including swelling, discharge, persistent licking, or limping. Your cat should also receive professional attention if they appear lethargic, refuse to eat, or show signs of severe pain beyond the initial incident.
If you’ve cut multiple nails too short during one session, a veterinary examination helps ensure no complications develop and provides guidance for future nail trims.
Cat Nail Clipping Schedule and Maintenance Tips
Regular cat nail clipping requires proper timing and well-maintained tools to keep your cat comfortable and prevent overgrown claws. Recognizing when your cat’s nails need attention helps you establish an effective grooming routine.
How Often to Trim Cat Nails
Most cats need nail trimming every 1-2 months to maintain healthy claw length. Indoor cats typically require more frequent trims than outdoor cats because they don’t naturally wear down their nails on rough surfaces.
Your cat’s activity level and scratching habits influence the trimming schedule. Cats who regularly use scratching posts may need less frequent trims, while sedentary cats often need more attention. Senior cats and those with limited mobility particularly benefit from more regular maintenance since they scratch less actively.
You should follow a 2-3 week trimming schedule for optimal results, though this varies by individual cat. Some cats grow nails faster than others due to genetics, diet, and age. Start with monthly sessions and adjust based on how quickly your cat’s claws grow back to their previous length.
Maintaining Cat Nail Clippers
Pet nail clippers require regular cleaning and inspection to ensure safe, effective cuts. Wipe the blades with rubbing alcohol after each use to remove nail debris and prevent bacterial buildup.
Check your clippers before each trimming session for dull or damaged blades. Sharp blades make clean cuts that reduce splitting and discomfort, while dull blades crush the nail and cause pain. Replace scissor-style or guillotine-style clippers when they no longer cut smoothly through the nail in one motion.
Store your clippers in a dry location to prevent rust and deterioration. Keep them separate from other grooming tools to avoid damage to the cutting edges. Quality pet nail clippers typically last 1-2 years with proper maintenance and regular use.
Signs Your Cat’s Nails Are Too Long
You can hear clicking sounds when your cat walks on hard floors if their nails have grown too long. This audible clicking indicates the nails are touching the ground with each step, which means they need trimming.
Your cat getting caught on furniture, carpets, or their scratching post signals overgrown nails. Long nails curve excessively and snag on fabric surfaces, causing frustration and potential injury. If your cat keeps getting caught on their scratch post, immediate trimming is necessary.
Watch for changes in your cat’s gait or reluctance to walk normally. Overgrown nails can curl into the paw pads, causing pain and potential infection. You should also check if the nails appear to curve sharply toward the paw pad or extend beyond the fur on their paws.